This was my first try after painting figures for a while for this battle. I had been making only slow progress mostly painting the Williamite infantry. After finishing my first Jacobite unit which is Tyrconnel’s horse regiment I decided to run through the scenario provided by the Twilight of The Sun King Rules in their scenario book 1 Louis XIV At War. This scenario is scaled down from the actual number of units at the battle which is not that many in the first place. This was my first time running the battle that I hope in the future to be able to run at my local club.

William III’s Forces to cross the thinly defended River Boyne at multiple places a real difficult situation
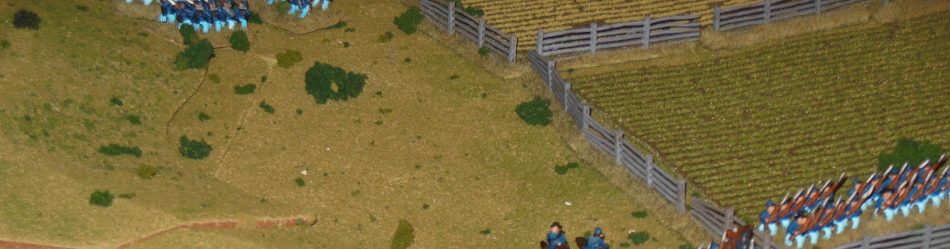
As I did not have all the units painted up yet many stands are just blank with no figures. Not as much fun that way but still this is better than nothing. I wanted to get the solo game in and work on getting better with the rules. The Jacobite forces I put on the hill far away from the rivers edge but also back from the artillery. The Jacobite’s in the scenario have no artillery and even though it is hard to cross the river as you need to make two rolls it is still a challenge for the Jacobite forces to not be broken.
I started the forces of William III out in column as I thought this was somewhat realistic. No artillery to slow them down meant they moved to the river at a good pace. The Dutch Guard tried to force the crossing at the Oldbridge. This was the easier point to cross at needing a lower roll to get across. With the forces of William III trying to cross all across the river at multiple points it was going to be very difficult to defend. As I did not build up a town at Oldbridge in this game the elite cavalry of Tyrconnel’s regiment met the elite infantry of the Dutch Garder te Voeth head on. Tyrconnel lost a morale point and was forced back to regroup behind the hill. The other three dutch regiments forced their way across as they met no resistance. Hamner’s British regiment after several rolls crossed the river and James II Irish Guard came down the hill towards them. This while Tyrconnel horse were rallied and came back for another attack.
The Jacobite foot unit the Earl of Clanrickarde was warn down by attacks from several Dutch infantry units and cannon. With no support as Tyrconnel was in the rear it was somewhat on it’s own and destroyed. I actually tried to save it as I had given the Jacobite forces an extra commander for the scenario of James II who gave it a reroll to make morale. I rolled a horrible two destroying the unit and rolled for the commander killing James II. I reality that would have ended the battle as James II death would have stopped their any reason for continuation but I played on.
The horse of Tyrconnel charged the Dutch Garder te Voeth again and broke them. I rolled to see if they took the colors and they did. (That is my own added rule not in the rule book if a unit is destroyed the other unit rolls to capture the colors. )
The Jacobite way was looking brighter as Dongan’s dragoons hit the raw British infantry unit Bellasis in the flank and destroyed it. Two units down but still the forces of William III were not at the point of making army morale rolls and they had crossed at multiple points. Then Dongan’s dragoons were hit by fire from the Huguenot infantry regiment Cambon and Danish regiment Funen. The dragoons were destroyed and this left the Irish Guard to face down 5 infantry regiments with one more still crossing the river. Tyrconnel’s horse were still on the field but down to only one hit. Then the Jacobite’s did not make the army morale roll forced on them by being at 50% after 8 turns. Thus the would leave the field. Most likely only the horse would have gotten away. A victory for the forces of William III but not perhaps as large as it could have been.
Learned from the Game
- It is harder than I expected to cross the river the Danish Guard infantry and Juel’s Danish cavalry never rolling to cross.
- Just like real life it is very hard for the Jacobite forces to cover all the crossings, so even though it takes time when they get across it is a real problem.
- Perhaps their should be a turn limit on the game for a better chance of a Jacobite victory.
- When things started to go bad for the Jacobite’s it happened fast as they had no real reserve or support.
This was both a good game for trying this scenario for which I have been painting figures and getting the rules down pat. Further, it is just a good to get to game for change even solo.
