
The Dutch Guards moving towards Oldbridge defended by Earl of Clanrickarde’s regiment
On Veterans Day I got to play a second play through for the Battle of the Boyne in 1690 between the forces under James II (Jacobite Forces) and William III in Ireland. Again, I played this game using a combination of painted figures and empty stands to reflect units I have not finished painting yet. The rules used are Twilight of the Sun King and the scenario is from one of the scenario books for the rules. I tried to change somethings up from the first play through to see if things could be different from the last game.
Besides having a few more units painted I made the following changes. I placed one unit in Oldbridge as historically was present. This being the Earl of Clanrickarde’s infantry. I did have Oldbridge sitting back from the ford a little bit and made them a trained unit not a raw unit like in the scenario book. Further, I went for an aggressive forward defense moving the Earl of Clanrickarde’s unit to the edge of the ford at Oldbridge to contest the crossing. Further, I moved the lone Jacobite dragoon unit to the edge of the river and dismounted them to contest another crossing elsewhere on the river. The forces under William III were in line not column this time so were slower getting to the river than the last game.

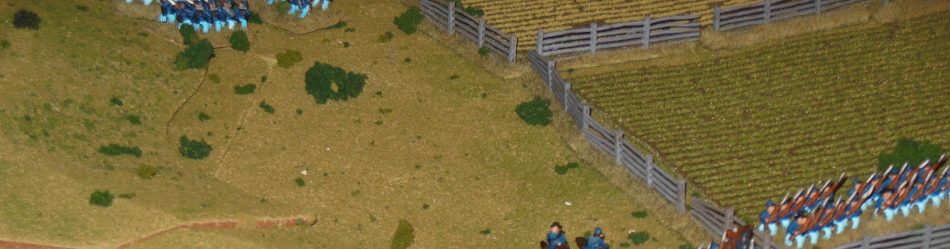
Defending Oldbridge Ford with a forward defense
The forces of James II are still vastly outnumbered and have to many crossing points to cover even though the crossing takes multiple rolls to complete and is more difficult if not at Oldbridge ford. For the forces of William II again they moved against several places at one time trying to cross in unison. The Dutch guard crossing at Oldbridge with support from a second Dutch unit. I tried to move the lone Williamite cavalry unit to cross next to Oldbridge to draw off the elite cavalry of Tyrconnel. This did not really work for one thing the unit never made a roll to even get into the water let alone on the far bank of the river. The plan to ride around the flank of the Jacobite line and draw off their elite cavalry never materialized.
The forward defense had mixed results for the forces of James II. The Earl of Clanrickarde’s did alright contesting the ford at Oldbridge for a while as moved Tyrconnel’s cavalry into Oldbridge for support. This was an rules error on my part. Cavalry can’t enter a built-up area so they would not have gotten the support. The dragoons did briefly hold up a unit at the bank of the river but were still not enough on their own and were hurt and then destroyed. Moving up the Irish Guard of James II still left them having to face too many units on its own though the scenario calls them an elite unit it is a tall order.
Just as in the first time I played the scenario the elite cavalry of Tyrconnel’s were forced to retire after a combat loss with no support and took some time to regroup. They ended up destroying a unit when the returned to the action later in the game but again were not enough to hold up all the Williamite infantry crossing.

The forces of William III overwhelming the lone Irish Guard unit.
So again, in this game the forces under James II were broken by turn 10. This game the forces of William II crossed the river in multiple places in about the same amount of time. They were slower reaching the river but made rolls to cross faster than the last game. Some units were briefly held up on the banks by forward units of James II. Still the wait of numbers tells and by the eighth turn the Jacobite forces are in serious trouble facing way too many troops that have crossed in multiple places. This is historically accurate.
Things I have learned from these games:
- As the scenario is written the game is rough on the Jacobite side to win. The scenario reduces their already historically low number of troops at the crossing around Oldbridge. This would I believe make it not very fun to be the Jacobite side in a game at the club or at a convention though historically accurate it might be.
- The Jacobite forces are too few to go and defend the edge of the riverbank. The troops are not enough they will get just warn down earlier.
- The scenario will need to be tweaked for a little more interesting play. Somethings that can be done are.
- Give the Jacobite forces the full number of troops they had historically at Oldbridge which is still only 4 infantry regiments and two to three cavalry units.
- You will still then up the number of infantries for the Williamite side to 10 or more infantry units two cannons and 1 cavalry that were historically present which is still large force for the Jacobite forces to face.
- Perhaps most important you make it a timed game that it is dependent on breaking the Jacobite side or capturing key terrain by a certain game turn.
- You could through in the variable of the two-battalion infantry regiment that historically never saw action and retreated with the cannon being rolled for to add to the Jacobite forces. If you give a player a chance to roll for either a cannon or the infantry unit arriving as a reserve, it could add the balance for the Jacobite forces though not historically accurate.
I am going to continue to paint up the forces that were historically at the crossing at Oldbridge and play the game several more times. I like to play even solo, and it gives me a feel for the rules and the scenario in general and ideas to make it possibly better. There are also the other two flanking marches that the forces under William III made and crossed both up and down the river from Oldbridge that could be played but they are also I feel have limited possibilities though more troops would be involved. Ultimately, I will add to my current forces to paint the historical units in each sides army to use for this battle and others even if not actual historical battles. For the future units from both sides can be used for scenarios of battles in Flanders but I feel those are beyond the solo gaming for now.

Cool battle report. Too bad the fight is so uneven, although if you’re solo gaming/practicing the rules/just having fun, that’s no problem. Keep painting!–TheGM
Thanks GM, well sometimes the honest truth is they lost the battle for a reason and you can’t change the outcome unless you totally change the situation. I am having a goodtime and getting better with the rules so that counts for something.